As a mobile app development framework, Flutter has many things going for it. It’s easy to learn, reduces costs of developing multi-platform apps, has growing community support, and for all intents and purposes, is on its way to becoming the preferred mobile development framework in the future.
But there’s one aspect of Flutter that has won it plaudits from mobile app developers from around the world – Widgets.
What are Flutter Widgets?
In Flutter app development, widgets are everything.
To give you an analogy, Flutter widgets are similar to the small reusable components used in JS frameworks like Vue or React.
Every element of your Flutter app’s user interface is a widget. So, the text is a widget, as are the buttons, images, checkboxes, and everything else displayed by your app.
If you’re familiar with Android or iOS development, then Flutter widgets have the same role as views (Android) and UIViews (iOS). But for a more accurate description of widgets, think of them as a blueprint that Flutter uses to create view elements and display them on your device’s screen.
This also means there’s more to Flutter widgets than just structural components. So, for instance, the layout columns in your Flutter app are widgets, as are elements like padding, styles, and even gesture detectors.
Flutter Material & Cupertino Widgets
One of the best things about Flutter is the wide variety of Android and iOS style widgets it offers out of the box. For a newbie Flutter app developer, this comes handy as it enables them to create beautiful mobile apps even with a passing knowledge of design.
While the Material widgets are designed to appear like Android applications, the Cupertino ones stand-in for iOS apps. Apart from hundreds of such in-built widgets, Flutter also lets you create custom widgets with minimal effort.
How are Flutter Widgets Structured?
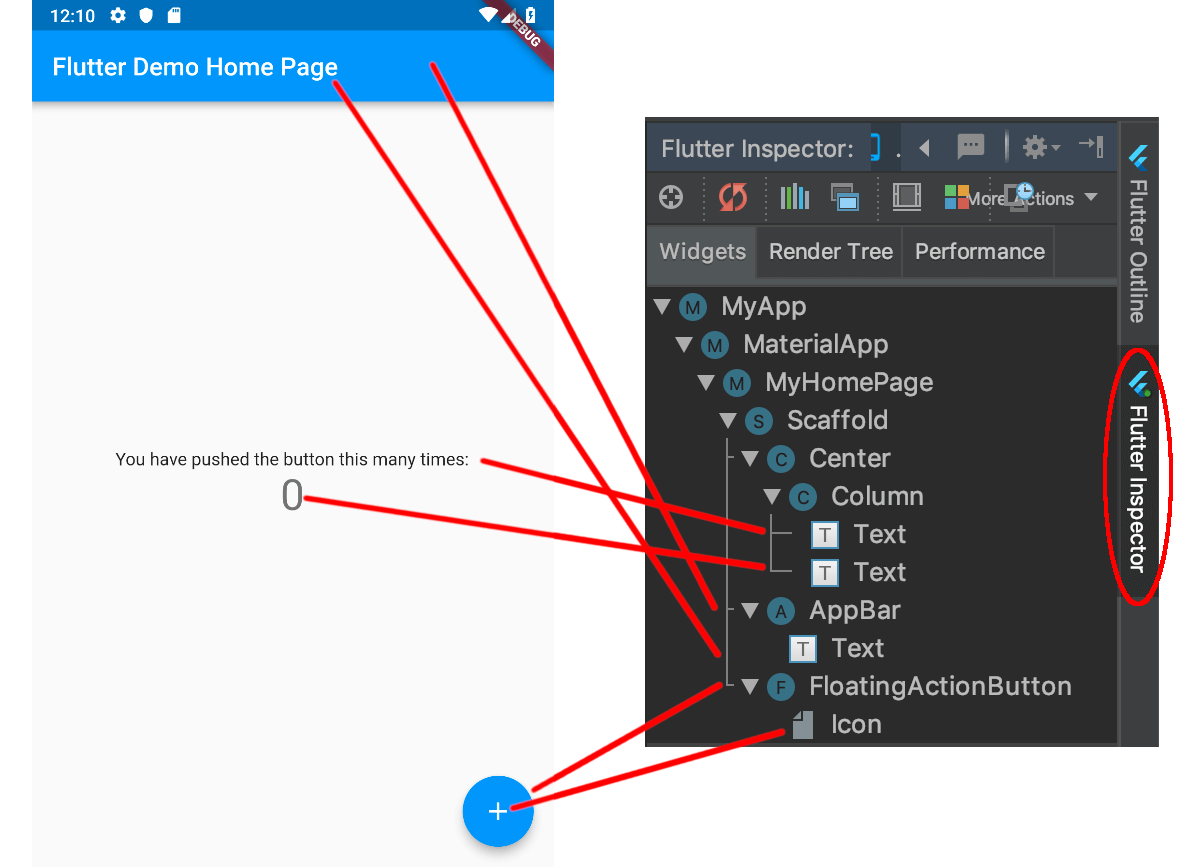
The widget tree in Flutter consists of parent and child widgets. This widget tree is the layout that greets you on opening a Flutter app. Below is a widget tree for a default Flutter app. The widgets visible to you are highlighted by the red lines. The remaining non-highlighted elements in the widget tree make up the app’s layout and functionalities.
What are the Types of Flutter Widgets?
Widgets in Flutter are immutable, which means they can’t be changed. A widget’s properties are final and cannot be set unless the widget is initialized. This makes it easier and inexpensive to recreate a widget when a widget tree is changed.
In Flutter, there are two kinds of widgets – stateless and stateful.
As apparent by their name, stateless Flutter widgets do not store changeable values. For instance, the Icon widget shown in the fig. above is stateless as it doesn’t change after you first create it. The same can be said of the Text widget too, where you have to create a new widget altogether to change the actual text value. In other words, you can’t modify the text value of an existing Text widget.
Stateful widgets, on the other hand, allow you to change the state of a widget. Now that might sound contradictory to the assertion at the start of this section that said Flutter widgets cannot be changed. But, it isn’t. Here’s how.
While it’s indeed immutable, a stateful widget creates a State object to keep track of any changes. So, when the values in the State object are changed, it creates an entirely new widget that reflects these changed values.
An apt example to explain stateful widgets is Checkbox. Its state changes every time the user ticks a box. Other examples of Stateful widgets include Form, TextField, and Slider.
How to Create a Flutter Widget?
You don’t need to know a lot about Flutter to create widgets. But what you do need is a Flutter app development environment. You can choose and set up one from either Android Studio, IntelliJ, or Visual Studio Code. And yes, you also need to know the process of creating a Flutter app.
We’ve previously written a simple and all-encompassing guide to create your first Flutter app.
Do check it out before proceeding with the rest of this Flutter widgets tutorial. We’ve included plenty of resources and links to help you understand how to write your first Flutter app.
Flutter Widget Examples
Now that you know what’s needed to build a Flutter app, you can understand how Flutter widgets work through these simple examples. Most of these are common widget examples whose code you can run in your preferred editor for better understanding.
If you’ve read the guide linked above, you’ll know that main.dart is where your app’s code is stored.
To understand Flutter widgets better, we’ll start from a clean slate. So, open the main.dart file and replace all its contents with void main() {}.
Now reload the app and you’ll be greeted by an empty screen. The main() forms the starting point for any Flutter app. But by emptying its code, we’ve created an app that does nothing. Instead, we’ll use it to test the codes for the different Flutter widgets below.
Flutter Container Widget
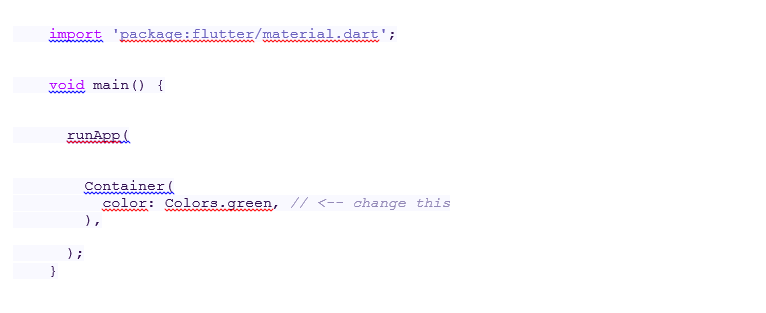
As obvious by the name, the container widget comprises all the other widgets of a Flutter app. But rather than putting other widgets, we’ll tinker around with its color value.
Open the main.dart file and replace all its code with the below code.
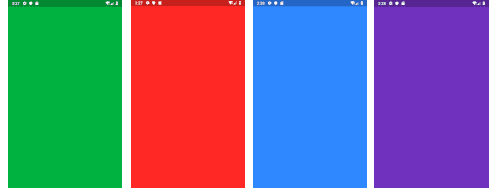
Now, restart the app and you will be greeted by a green screen. You can try out different colors by replacing the Colors.green with values like Colors.red, Colors.blueAccent, and Colors.deepPurple.
Flutter Text Widget
While that was easy enough, we’ll now look at how you can change the property values for a Flutter widget.
Let’s consider something that’s an essential part of whichever app you create – text. For creating this widget, we use the MaterialApp widget, which not only gives the app a nicer look but also makes the code simple.
Moreover, the build() method also lets you use the hot reload function to see your changes instantaneously, instead of restarting the app every time as in the Container widget example above.
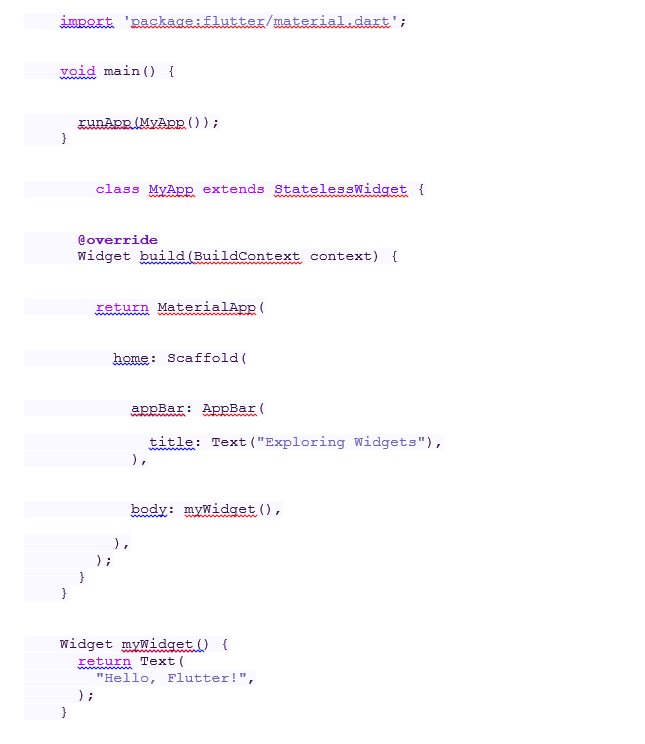
Now, replace all the code in the main.dart file with the below code.
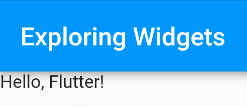
On your device or simulator, you should see this.
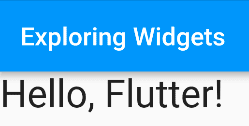
Now, you can play around with the size of the font by adding a TextStyle widget to the style property of Text.
In the above code, just replace myWidget () with the below.
And the output on your device should look like this,
The TextStyle widget enables you to change a lot of other properties of Text like font, color, shadows, spacing etc.
Over to You
These were just a couple of Flutter widget examples that we tried out here. As a budding Flutter app developer, there are plenty of sources to help you learn about and experiment with Flutter widgets. The official Flutter widget catalog is a huge resource and offers an excellent starting point. You’ll also find scores of Github Flutter widget repositories that you can use to understand how widgets work in Flutter.
Widgets are central to the Flutter app development process. By learning to create and experiment with widgets, you can develop a UI for your Flutter app that’s not only beautiful but also highly intuitive and functional.
Did you find this Flutter widget guide useful? Which aspect of Flutter widgets do you like the most? Do let us know your thoughts in the comments.
Digital Marketing Manager
Responsible for developing and managing web presence, Sarah has been associated with eLuminous Technologies for 7+ years. Strategic and innovative with a passion for Content Marketing and enhancing brand awareness. Administered all business marketing operations and advertisement campaigns that eventually increased web traffic. She works under the motto “Think like a Publisher, not a Marketer.”
