 Book a Meeting

Building apps without a lot of coding can feel enticing. Use drag-and-drop, experiment with a few features, and voilà! Your business app is up and ready to deploy.
And if you’re into low-code, Power Apps is a familiar name. It’s been ten years since its launch, and the platform keeps improving with new updates. But general know-how doesn’t always translate into real-world results. For great things to happen, you need to know how to make Power Apps work in your setup.
This Microsoft app development platform already has a customer base of over 15600 companies. If you’re one of them, it’s worth realigning how you use it for the best results.
Below, we’ll give you experiential tips and steps for creating apps with this low-code platform. In addition, you’ll understand how they can fit perfectly into your workflow.
Tips to Make Power Apps Work for Your Business
We won’t start with defining what Power Apps is all about. But if you do want all the basic information, read our beginner’s guide on Power Apps.
At a glance, here are the main pointers that relate to our topic:
- You can use Power Apps to create custom web and mobile applications
- This tool is basically part of Microsoft Power Platform
- It can connect with Excel, SharePoint, Power Automate, and more
- Speed, simplicity, and user-friendliness make Power Apps useful for companies
Now that you have a quick overview of this platform, let’s get into the steps.
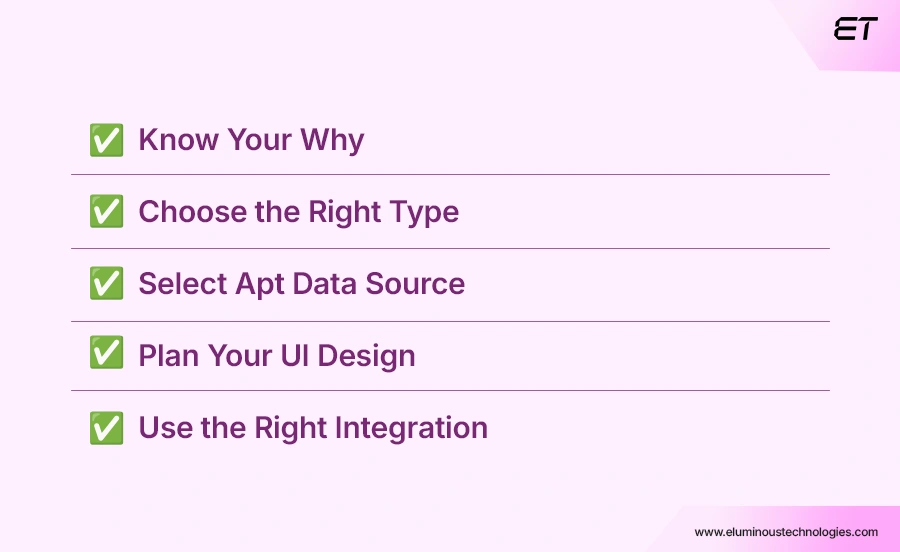
1. Align Your Business Requirements
First, decide why you want to use Power Apps in the first place. It’s wise to address the following questions:
- Who will be your end user?
- What problem will the app solve?
- Who needs access to the information?
- What dashboards do you need?
For instance, you can be vague and say, “Let’s build a maintenance application using Power Apps.”
A better definition would be: Our maintenance application will enable technicians to submit equipment maintenance requests. Supervisors will assign them, and managers can easily oversee request status.
2. Choose the Right Type of Power Apps
Canvas and model-driven are the two main types of Power Apps. The third type, Power Pages, is a standalone product from 2022.
So, to make Power Apps work for your end use, note this:
- Use canvas apps for better control over an application’s interface and UX.
- Choose model-driven apps if your use case is more data-driven.
For a more handy comparison, refer to the table below:
| Canvas | Model-driven |
| Start with a blank screen, drag-and-drop elements | Start with a component-based layout (similar to Dynamics 365) |
| Connect with several data sources | Develop within the Microsoft Dataverse |
| Well-suited for mobile and tablet apps | Good utility in building complex business processes like CRM, asset tracking, etc. |
So, to make the best use of this low-code platform, ensure you choose the right type.
P.S.: If you’re interested in understanding how Power Pages are unique, read our Power Apps vs Power Pages comparison.
3. Select a Proper Data Source
To make Power Apps work efficiently in your development workflow, choose the right data source. You can choose one of the following sources to store your app’s data:
- SQL Server
- Microsoft Dataverse
- Dynamics 365
- Business central
- Excel
- SharePoint
The right data source can impact your application’s stability, security, maintenance, and performance.
For instance, if you use Power Apps to develop a simple internal application, SharePoint can be sufficient. But for complex business apps, an SQL Server or Dataverse will be a more secure and apt choice.
4. Plan the Interface Design
Get this straight: Low code doesn’t mean you can just get on with it.
To make your application look good, work well, and be user-friendly, you need a solid plan. Power Apps gives you several controls, including buttons, dropdowns, labels, input fields, forms, and more. You need to design what your screen looks like.
We always plan a wireframe before using Power Apps. Low-code can speed up development, but a well-thought-out interface is irreplaceable.
5. Use Power Automate and Other Integrations Wisely
Since the 2025 update, Power Apps has become well-suited for enterprise automation. You can integrate your apps with Make, Zapier, Azure Logic Apps, and other third-party options.
But if you want to stay inside the Microsoft ecosystem, Power Automate is a worthy choice.
Here’s a small example. Suppose you develop an internal employee application with Power Apps. Your employee submits a leave request. Now, you’d want to:
- Store the info
- Notify the manager
- Send it for approval
- Update the status
- Notify the employee
Power Automate can make this happen fluently. Both share the same Microsoft foundation and support instant setup and hybrid automation (RPA).
How to Build an Application Using Power Apps
Now that you know how to make PowerApps work in your business setup, it’s time to get hands-on experience. This section contains all the crucial steps you can follow in your low-code development journey.
1. Sign in to Power Apps
First up, open the official page of Microsoft Power Apps.
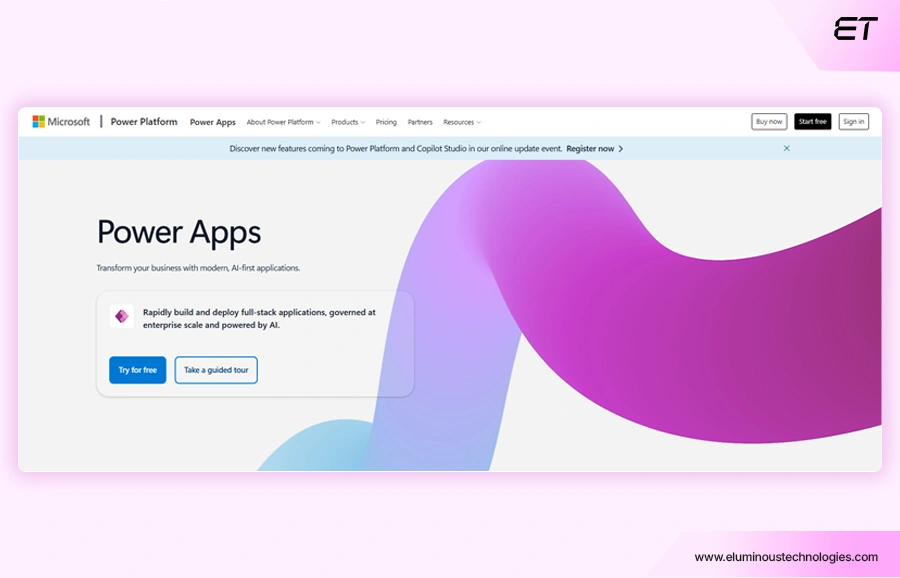
You can see the ‘Sign in’ option in the top right corner. Click on it and enter your Microsoft account details.
Once you enter the environment, locate the ‘Create’ option on the left-hand side of your screen. Click on it, and you will see multiple options to create your app.
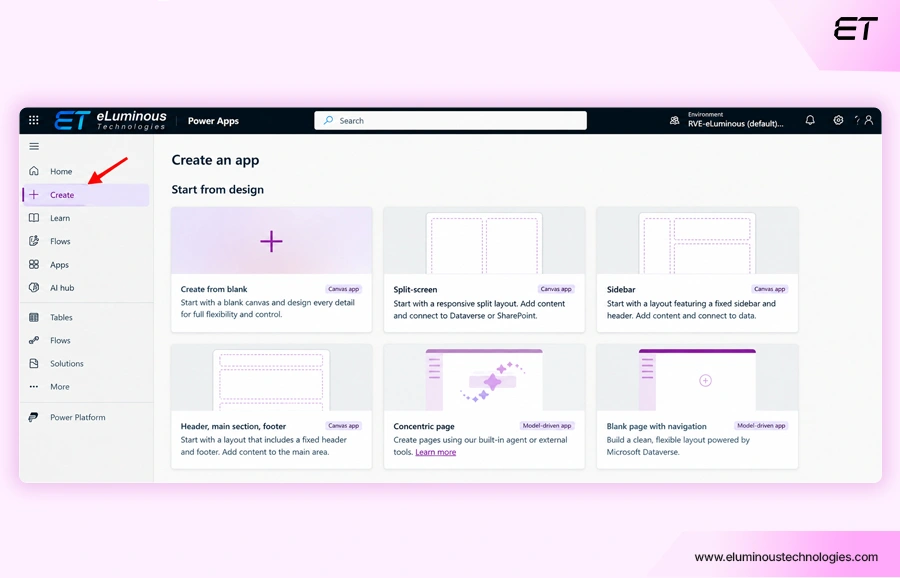
If you choose the Canvas app type, you have options like a blank screen, split-screen, sidebar, and a layout with a header, section, and footer.
For the model-driven type, you can use the built-in AI agent like Copilot, blank page, view and form, or dashboard layout.
2. Set Up Your Custom Application
Your setup process will be different in Canvas and model-driven types.
For Canvas apps:
- You can choose a suitable option like blank canvas or a pre-defined template
- Let’s consider you choosing the blank canvas option
- You’ll get three layout options for the same
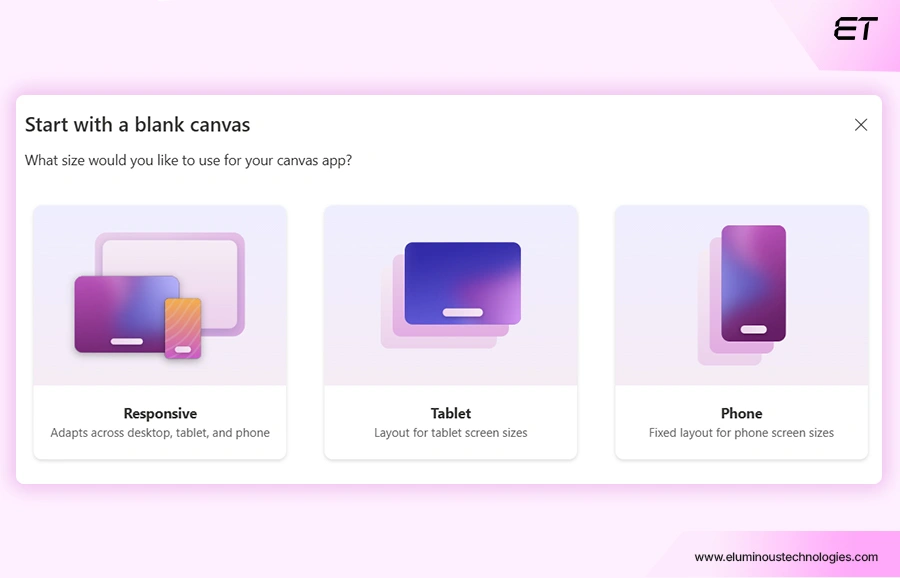
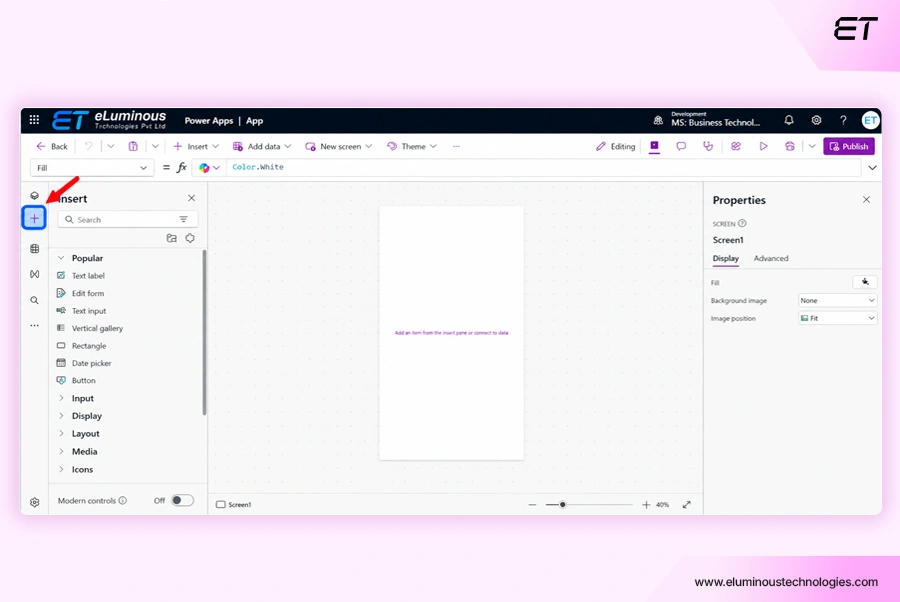
Now, click the one you want to open a new window. This is the Power Apps Studio, basically your playfield to make Power Apps work for your development activity.
On the left, you can click on the ‘+’ option to insert different elements for your application.
For Model-driven apps:
- We suggest you keep the required data ready before you begin developing an app
- You need to enter a name and description of your application to begin
- In our example, we’ve named the app ‘Internal Employee Application’
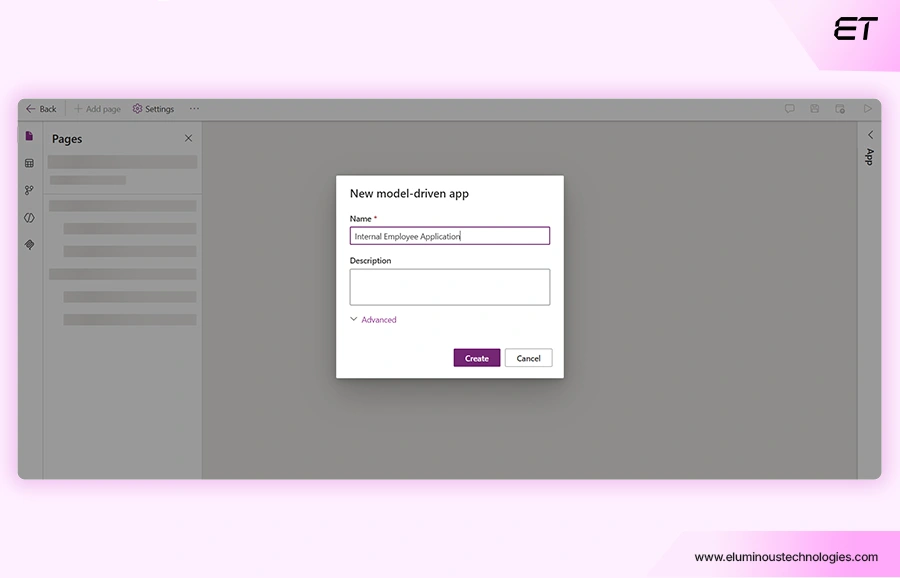
Once you click ‘Create,’ you’ll open a new window to start developing your application. Again, you have several options on the left-hand side.
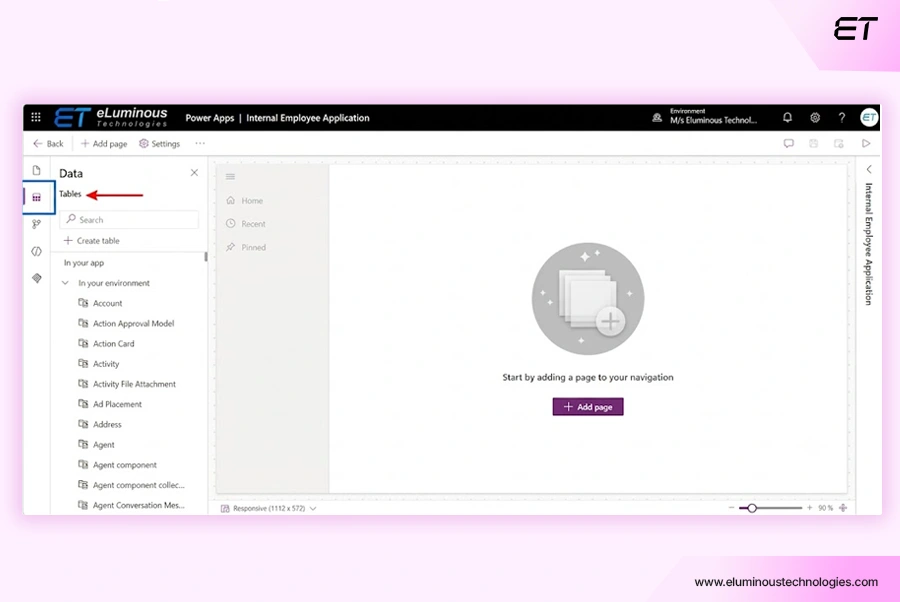
You can add relevant Dataverse tables, navigation components, pages, and much more.
3. Connect The Right Data Sources
To configure the required data in your application, you need to choose the relevant option. These options depend on the type of Power Apps you’re using.
For Canvas apps:
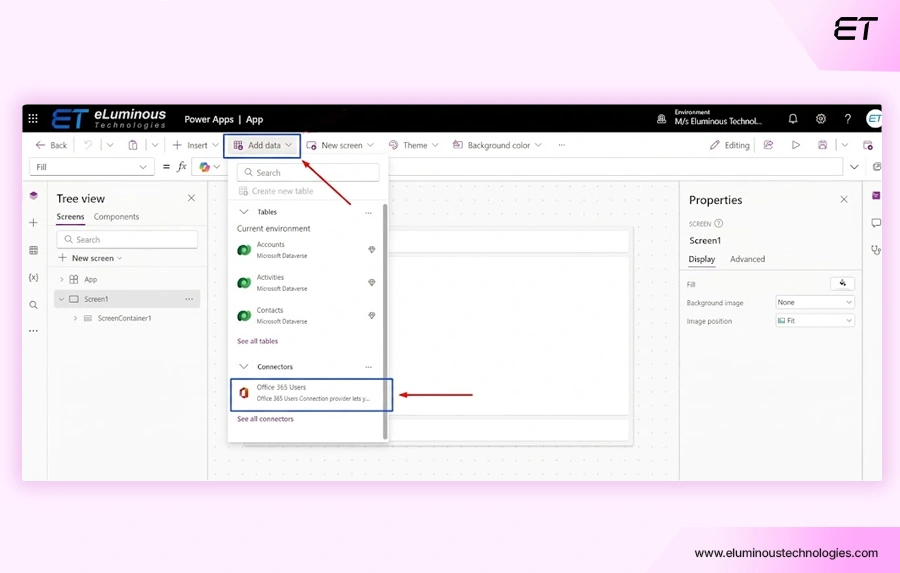
- Once you’re in Power Apps Studio, click on ‘Add Data’
- You’ll then see a list of tables, environments, and connectors
- Choose a supported connector like Office 365 or SharePoint
- Authorize the connection and start configuring your controls
For Model-driven apps:
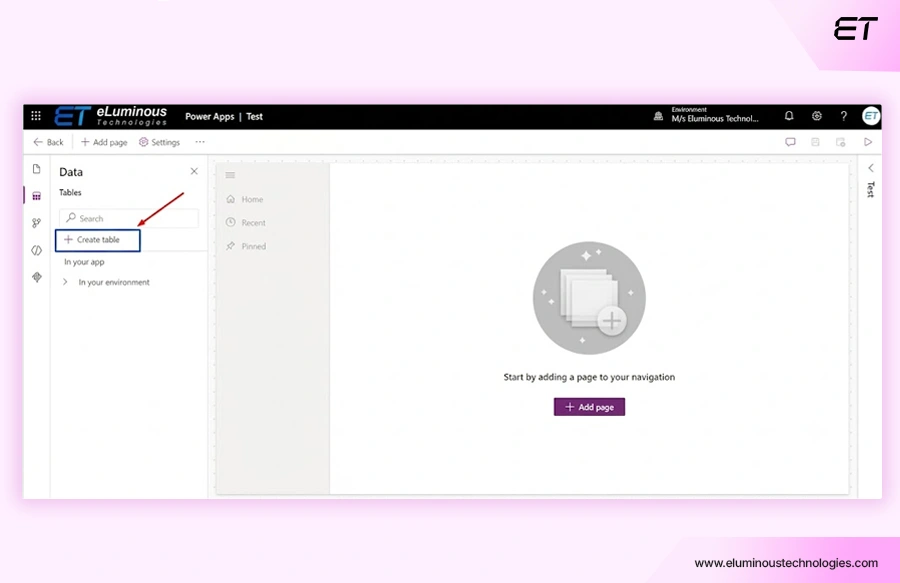
- You’ll need to click on ‘Data’ in the maker portal
- There, you’ll find options to create a Dataverse table
- Click on ‘Create Table’ and review the columns and relationships
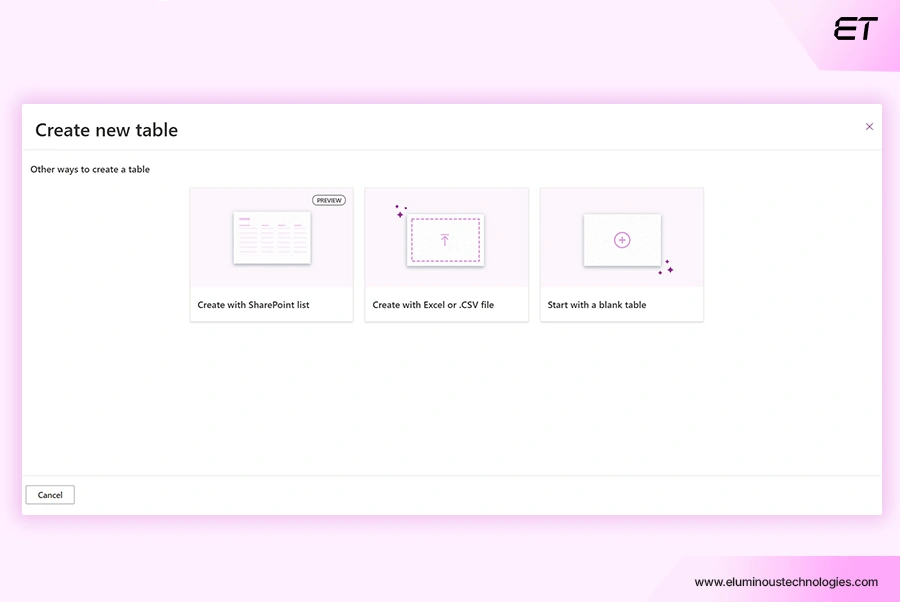
You can use a SharePoint list, Excel file, or customize a table as required. The app designer lets you create a detailed application with minimal hassle.
4. Configure Your Application’s Functions
Once you’re happy with the design, features, and data connectivity of your new application, make it ready for the end user.
For Canvas apps, you can use controls and Power Fx formulas. These options enable you to configure validations, navigation, data, etc.
For model-driven apps, you can also use Power Automate. This way, you can automate workflows when you want. That’s how you make Power Apps work the way you want, without deep coding knowledge.
5. Test Your New Application
You can test your application in the Power Apps platform. Open it in ‘preview mode’ and use the testing options.
Here’s a quick checklist on what to test and validate:
- Screens
- Forms
- Navigation
- Data entry
- Updates
- Record retrieval
- Workflows
- Business rules
- User permissions
These points will vary as per the complexity of your new application. Still, it’s crucial to check whether all these facets work well before you go live.
Note: If you need help developing workflows or business rules, a Power Apps consulting team may be worth considering.
Mistakes to Avoid When Using Power Apps
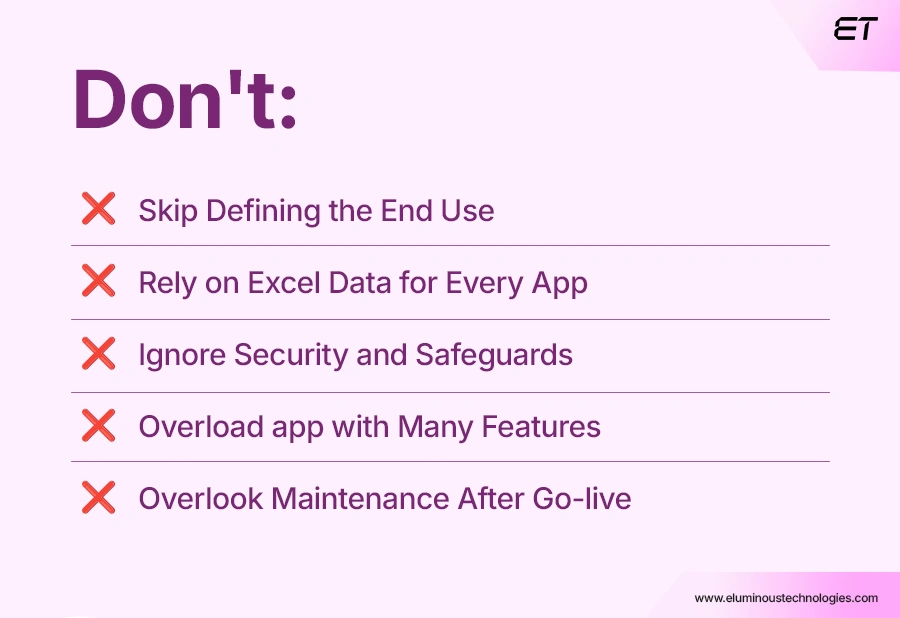
If you’re building an application on your own, here are a few common blunders to avoid:
- Building before defining the business utility of your application
- Using Excel as a long-term data source, even for complex applications
- Ignoring user access and permissions in the design stage
- Creating too many features because Power Apps makes them easy to add
- Neglecting app maintenance post-deployment
You can make Power Apps work for your business if your end utility is straightforward and you have some Power Platform expertise. However, if your application has complex processes, large datasets, or advanced security requirements, we suggest hiring Power Apps experts.
To Wrap Up: Make Power Apps Work Effectively For Your Business
To make PowerApps work efficiently for your company, you should know what you want to develop. You need to define the purpose, target audience, features, need for AI integration, and choose the right data source.
Also, select the right Power Apps type to build your application. For simple apps focused on great UX, choose Canvas. For data-intensive apps, go with the Model-driven category.
You just need a basic Developer plan to get started. It’s free right now and can show you a significant glimpse of this low-code platform. And if you want to get serious or have the premium plan, chances are you want to use it to build complex apps as well.
In that case, we can make your job a tad easier. Our Power Apps developers can handle all development, integration, design, and maintenance. You can onboard one or more resources within 72 hours and get your project started. For more details, contact us, and we’ll get back to you right away.